Overall
Summary
If you are short on time and money then the Gnome Partition Editor with Dedian Live is one of the best ways to recover lost hard drive partitions.
Pros
Freeware utility to manage or copy SATA hard drive partitions.
Cons
Linux skills needed, requires a working internet connection, access to a CD-R drive and disc.
To get the quickest response time on my software development server, I decided to use a Transcend V Series TS32GSSD25S-M 32Gb SATA SSD hard drive as the primary boot partition. The risk was one day running out of free space but I never imagined that would result in a complete boot failure!
The inevitable happened when I installed BOINC on my AMD 1090T workstation and attached the project Androinc. The SSD SATA hard drive quickly filled up with numerous files that overextended the partition and caused Windows Server 2003 to come to a complete stop. My solution was to use the handy bootable CD made possible by the utility called GParted to copy the partition to a new Western Digital WD1002FAEX SATA 6Gps 1Tb hard drive. How can you make a bootable file recovery CD using GParted? Will GParted recognize all your SATA hard drives and even a Thermaltake BlacX USB 3.0 docking station? How can you make an NTFS disk backup using Partimage? Read On To Find Out!
GParted is a combination of Linux utilities that all work together to help you fix or maintain your Microsoft Windows NTFS partitions. You can think of this system as a disc rescue or image backup program. The utility uses the Debian Linux 2.6.37 series kernel to mount your SATA, IDE, and USB hard drives in a shell and give you a veritable toolbox of goodies to configure them with.
INCLUDED PACKAGES WITH STANDARD GPARTED LIVE DISTRIBUTION
Mlterm – Multilingual terminal emulator (provides access to command line)
Partimage – Backup partitions into a compressed image file
Testdisk – Data recovery tool that can help recover lost partitions
Gpart – (Older) data recovery tool that can help recover lost ms-dos partition tables
Nano – Text editor
Vim-tiny – Enhanced vi text editor
Parted – Partition table editor (command line based)
Fdisk – MS-DOS partition table editor (command line based)
Gdisk – GPT partition table editor (command line based)
FINDING THE LATEST GPARTED ISO IMAGE
To make things simple, I suggest visiting gparted.sourceforge.net/livecd.php and clicking on the GParted Live on CD link near the top of the page to download the ISO file they provide. Once the gparted-live-0.8.0-3.iso file which is 123.5Mb in size has completed downloading, you can burn a copy to CD. CDBurnerXP is my ISO utility of choice because it will let you make CD or DVD ISO copies.
You can also create a custom GParted ISO file but that is beyond the scope of this article. I will say that I have been able to make some rather cool utility CD-ROM discs in the past using similar steps found on the main page for this project. You will just need a high-speed computer with a fast hard drive to make the complete file. If you have two hours of spare time and a little patience then most computer users should be able to include almost any file that would be needed on an ISO.
USING A GPARTED BOOTABLE CD
For this article, I used a Targus 8x ADV01US USB External DVD-ROM drive to boot the GParted ISO CD. You can also use a standard SATA or IDE CD-ROM drive. In your computer’s BIOS make sure you disable any other bootable drives so that the CD will run.
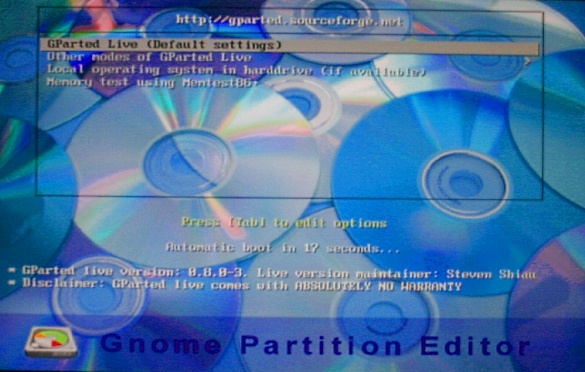
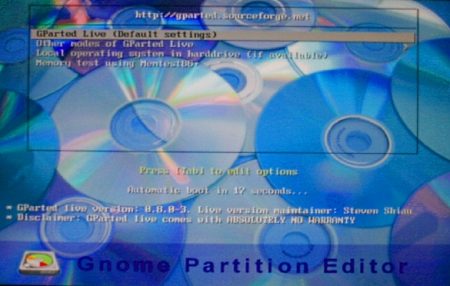
Here is the first screen you will see upon loading the Gnome Partition Editor. While not part of any of the documentation online, they also included a Memory test using Memtest86+ which is a very useful utility for analyzing problems with your computer’s memory.
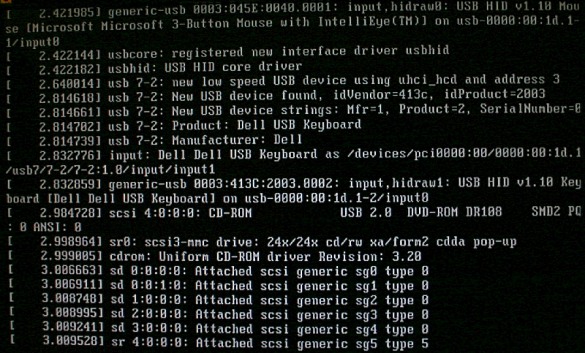
Booting into GParted Live from this point will take about 5 minutes on an ASUS P5QL-VM DO/CSM LGA775 motherboard with an Intel QX9650 and 5 various SATA hard drives connected. A Thermaltake Armor A90 system case was used to house all this equipment because of its spacious interior and massive cooling fans. During this time, the kernel is detecting your keyboard, mouse, and all the attached hard drives on your computer. If the kernel has a problem communicating with a hardware address it will timeout which is the cause of the apparent delay for booting the utility.
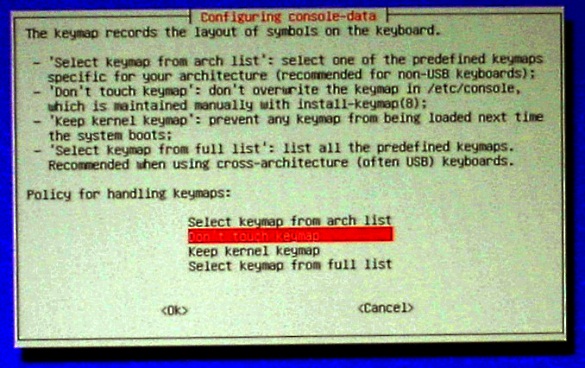
After the initial detection and mounting process has completed, you will see a Configuring console-data screen. I was using a Dell SK-8115 USB keyboard so they don’t touch keymap option was selected. You are going to be safe with this option for almost any PS2 keyboard you choose as well.
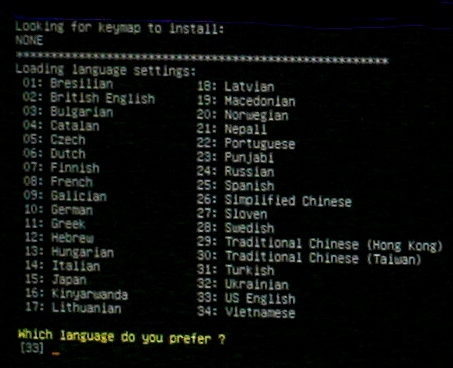
The next prompt will ask which language you prefer. Notice that on my Socket 775 motherboard it automatically choose 33, for US English. Just hit enter and continue.
Now you will get the X-window graphical environment options. Some computers do not support the video modes detected and will have to use the “sudo Forcevideo” configuration. You can customize your screen size here but for most users that are in a hurry, input 0 and hit enter!
GParted Booted And Operational!
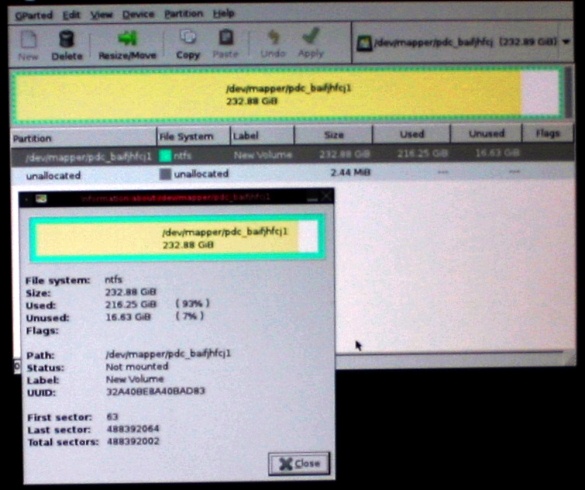
As soon as the software came up, it displayed the Western Digital WD2500BEKT 250Gb SATA hard drive that was in my Thermaltake BlacX 5G USB 3.0 Docking Station in the GParted utility window.
For my purposes, I was mostly concerned with creating a copy of the partition on the Transcend V Series TS32GSSD25S-M 32Gb SATA SSD. I was able to use the partimage utility to send a compressed partition image to the WD2500BEKT drive sitting in the BlacX 5G cradle.
Next, Partimage was used to restore the image to a spare Western Digital WD1002FAEX SATA that I have. The larger 1Tb drive would give me the flexibility to add more files but at the cost of reduced disk access times. I simply selected the drive from the list of attached Linux drives and copied the image over from the WD2500BEKT that was sitting in the Thermaltake USB drive cradle. About 10 minutes later, the Intel QX9650 processor had helped to complete the job in nearly record time and I was ready to test.
I placed the Western Digital WD1002FAEX SATA on an available port on my ASUS M4A89GTDPRO motherboard and set it as the primary boot drive in the BIOS. Windows Server 2003 came right up to its login window on the new drive.
WHAT’S MISSING FROM THE GPARTED LIVE CD?
I really wish Clonezilla was included with this GParted Live distribution. The utility is very similar to Norton Ghost but Clonezilla is even better. Unlike Symantec Ghost Corporate Edition, you can use Clonezilla to do uni-casting and multi-casting. As mentioned earlier, you can get creative and add Clonezilla to this distro but it must be done manually.
FINAL THOUGHTS
If you are short on time and money then the Gnome Partition Editor with Debian Live is one of the best ways to recover lost hard drive partitions. I still wish the GParted Live ISO image included Clonezilla or FSArchiver so that I have even more tools to work with on this CD. Additionally, you should not expect a fancy Windows-style interface with these command-line utilities. They are rather basic in appearance and many require command-line interaction. Still, I was happy enough with the results and was able to get my AMD 1090T crunching again on the BOINC project Androinc. I encourage anyone reading this article to make their own ISO CD today, just in case you should need it in the future!

